ActivePerl already includes many modules for common tasks like accessing databases, using network services, parsing XML files, compressing and decompressing data, or creating GUI applications.
Sooner or later you will want to use additional modules from CPAN that are not already included. You can either download pre-compiled binaries with the Perl Package Manager (PPM) or you can build and install the modules yourself with the regular Perl tools, like the CPAN shell. All it takes is a simple command like this:
ppm install Crypt::Blowfish
or:
cpan Crypt::Blowfish
The following information is accurate for ActivePerl 5.8.9.827, 5.10.1.1007 and 5.12.2.1202. For earlier versions details may be different.
USING THE PERL PACKAGE MANAGER
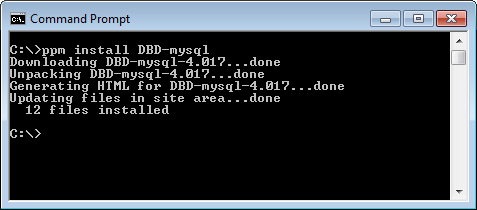
ActiveState maintains repositories of precompiled CPAN packages that can be installed with either the PPM command-line client, or the PPM GUI application. To install the DBD-mysql database driver all you have to do is run the ppm install command:
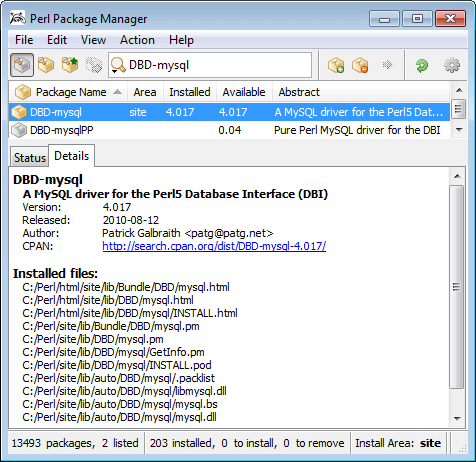
Alternatively you can run ppm without any parameters to invoke the GUI, search for DBD-mysql, select the DBD-mysql package, and perform the installation:
ActiveState downloads all new packages from CPAN once a day and tries to build them for each supported platform. The generated binaries will be added to the PPM repositories if:
- All required prerequisite modules are available.
- The build is successful.
- The module passes all of its own regression tests.
If you are ready to push your Perl scripts to production servers and are looking to meet your commercial support requirements, consider downloading ActivePerl on the ActiveState Platform.
USING ADDITIONAL REPOSITORIES
Even modules that failed to build on the automated ActiveState build system may still be installable via PPM: There are several other people maintaining additional PPM repositories, and often they go and spend the required manual effort to get these modules building.
PPM includes a list of public repositories, including the architectures they support. You can display the available repositories for your platform with the `ppm repo suggest` command and then add them to your PPM configuration using their shortcut names:
ppm repo suggest
ppm repo add uwinnipeg
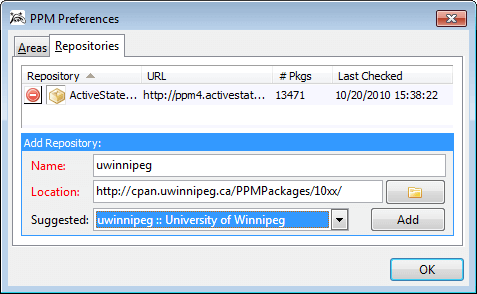
In the PPM GUI these additional repositories are included in the Preferences dialog in the Suggesteddropdown list:
Note that currently only the Windows platform has additional third-party PPM repositories.
USING PPM WITH A PROXY SERVER
PPM uses the LWP module to access the ActiveState package repository. If internet access must go through a proxy server, then the http_proxy environment variable must be set to tell LWP how to get a connection. The syntax for setting the variable depends on the shell; for the Unix bash shell it looks like this:
export http_proxy=http://proxy.company.com
And for cmd.exe on Windows it looks like this:
set http_proxy=http://user:passwd@proxy.company.com:8008
A common error is to leave out the protocol prefix (“http://” or “https://”) from the variable setting, in which case it will not work at all.
Many places on the net explain that the environment variables http_proxy_user and http_prox_pass need to be set. This information was true for the old PPM3 client and is no longer correct. Only the standard http_proxy variable is used.
The ppm log command is a handy debugging tool to display the last couple of minutes from the PPM log file in case the connection to the repo still fails after setting the http_proxy variable:
ppm log 5
BUILDING MODULES LOCALLY
It is always possible to attempt to build a module locally if it cannot be found in the PPM repositories. This requires both a make utility and often also a C compiler. On Linux the GCC compiler and the GNU make utility are typically already installed.
On Mac OS X both GCC and GNU make are part of Apple’s Xcode developer tools, which can be installed from the OS X installation DVD, or downloaded from the Apple Developer Tools website.
INSTALLING A MAKE UTILITY AND C COMPILER ON 32-BIT WINDOWS
For 32-bit Windows the recommended C compiler is either Visual C++ 6.0 with the bundled nmake utility, or the MinGW version of GCC for Windows together with the dmake utility.
Later versions of Visual C++ will work as well. They will however link against a different C runtime library, which in rare cases can cause some compatibility issues.
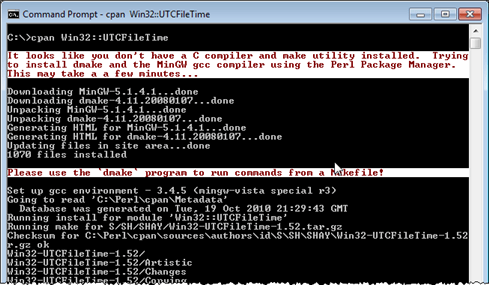
The CPAN shell will automatically download and install MinGW and dmake on first use if you don’t have Visual C++ or MinGW already installed and on your PATH:
If you want to use the MinGW compiler to build modules manually from the commandline, then you can install MinGW yourself using PPM:
ppm install MinGW
perl Makefile.PL
dmake
dmake test
dmake install
Tips:
- MinGW and dmake are being installed into C:\Perl\site\bin. Make sure this directory is on your PATH (done by default by the ActivePerl installer).
- You must use nmake.exe with the Microsoft compiler, or dmake.exe with MinGW. Using dmake.exe with Visual C++, or nmake.exe with GCC will not work.
INSTALLING A MAKE UTILITY AND C COMPILER ON 64-BIT WINDOWS
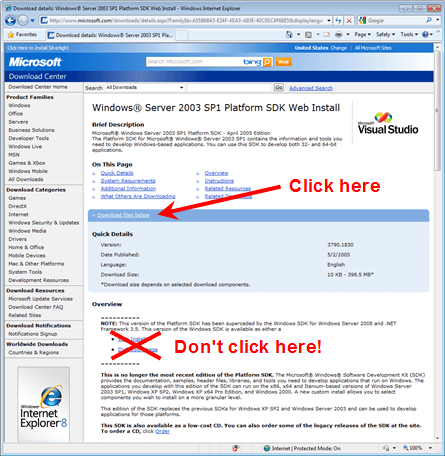
For 64-bit Perl on 64-bit Windows currently the only supported compiler is the Visual C++ compiler included in the Windows Server 2003 SP1 Platform SDK (aka the April 2005 edition).
Use the SetEnv.cmd script to set the PATH, LIB, and INCLUDE environment variables to the correct value for building ActivePerl extensions with this command:
"C:\Program Files\Microsoft Platform SDK\SetEnv.Cmd" /XP64 /RETAIL
SUMMARY
The easiest way to install additional modules into ActivePerl is by using PPM, the Perl Package Manager. But on each platform there is also a free native C compiler available that can be used to build modules locally if that turns out to be necessary.
If you are ready to push your Perl scripts to production servers and are looking to meet your commercial support requirements, consider getting ActivePerl on the ActiveState Platform.


