Before we start: This Python tutorial is a part of our series of Python Package tutorials.
Keras models can be used to detect trends and make predictions, using the model.predict() class and it’s variant, reconstructed_model.predict():
model.predict() – A model can be created and fitted with trained data, and used to make a prediction:
yhat = model.predict(X)
reconstructed_model.predict() – A final model can be saved, and then loaded again and reconstructed. The reconstructed model has already been compiled and has retained the optimizer state, so that training can resume with either historical or new data:
model.predict(test_input), reconstructed_model.predict(test_input)
Keras Model Components
- Architecture/Configuration. Specifies what layers the model contains, and how they are connected.
- Weights. Input parameters that influence output in a Keras model.
- Optimizer. Optimizer/loss function used to minimize loss. Usage: One of two arguments required for compiling a Keras model:
- Set of Losses and Metrics. When a model is compiled, compile() includes required losses and metrics:
model.compile(optimizer="adam", loss="mean_squared_error")
It’s also possible to save all or some of the components to disk in a ‘final’ model for future use, at the same time:
- Save/finalize everything in SavedModel format. SaveModel is capable of saving the model architecture, weights, and traced Tensorflow subgraphs of the call functions. When the final model is loaded again, the built-in layers and custom objects are reconstructed.
- Save everything in HDF5 format. HDF5 is capable of saving the model architecture, weights values, and compile() information. It’s a light-weight alternative to SavedModel.
- Save the architecture/configuration only, in a JSON file.
- Save the weights values only. Use when training the model.
How to Make a Prediction using Model.Predict()
In this example, a model is created and data is trained and evaluated, and a prediction is made using model.predict():
# Import the libraries required in this example:
import tensorflow as tf
from tensorflow import keras
from tensorflow.keras import layers
inputs = keras.Input(shape=(784,), name="digits")
x = layers.Dense(64, activation="relu", name="dense_1")(inputs)
x = layers.Dense(64, activation="relu", name="dense_2")(x)
outputs = layers.Dense(10, activation="softmax", name="predictions")(x)
model = keras.Model(inputs=inputs, outputs=outputs)
(x_train, y_train), (x_test, y_test) = keras.datasets.mnist.load_data()
# Preprocess the data (NumPy arrays):
x_train = x_train.reshape(60000, 784).astype("float32") / 255
x_test = x_test.reshape(10000, 784).astype("float32") / 255
y_train = y_train.astype("float32")
y_test = y_test.astype("float32")
# Allocate 10,000 samples for validation:
x_val = x_train[-10000:]
y_val = y_train[-10000:]
x_train = x_train[:-10000]
y_train = y_train[:-10000]
model.compile(
    optimizer=keras.optimizers.RMSprop(),  # Optimizer
    # Minimize loss:
    loss=keras.losses.SparseCategoricalCrossentropy(),
    # Monitor metrics:
    metrics=[keras.metrics.SparseCategoricalAccuracy()],
)
print("Fit model on training data")
history = model.fit(
    x_train,
    y_train,
    batch_size=64,
    epochs=2,
    # Validation of loss and metrics
    # at the end of each epoch:
    validation_data=(x_val, y_val),
)
history.history
print("Evaluate model on test data")
results = model.evaluate(x_test, y_test, batch_size=128)
print("test loss, test acc:", results)
# Generate a prediction using model.predict()
# and calculate it's shape:
print("Generate a prediction")
prediction = model.predict(x_test[:1])
print("prediction shape:", prediction.shape)
Reconstructed_Model.Predict() – Example
In this example, a model is saved, and previous models are discarded. The saved/final model is reconstructed, and training resumed with historical data:
# Import libraries needed for this example:
import numpy as np
import tensorflow as tf
from tensorflow import keras
# Define a basic model:
def get_model():
    inputs = keras.Input(shape=(32,))
    outputs = keras.layers.Dense(1)(inputs)
    model = keras.Model(inputs, outputs)
    model.compile(optimizer="adam", loss="mean_squared_error")
    return model
 model = get_model()
# Train the model:
test_input = np.random.random((128, 32))
test_target = np.random.random((128, 1))
model.fit(test_input, test_target)
# Finalize the model in \x_model folder,
# in saveModel format:
model.save("x_model")
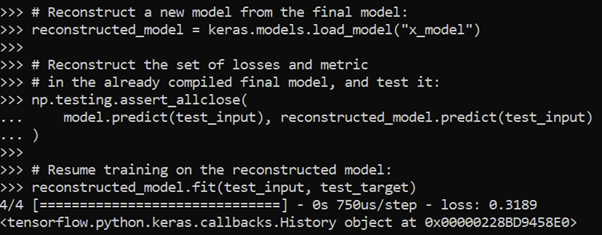
# Reconstruct a new model from the final model:
reconstructed_model = keras.models.load_model("x_model")
# Reconstruct the set of losses and metric
# in the already compiled final model, and test it:
np.testing.assert_allclose(
    model.predict(test_input), reconstructed_model.predict(test_input)
)
# Resume training on the reconstructed model:
reconstructed_model.fit(test_input, test_target)

Figure 1. Reconstruct a new model from the final model, using
reconstructed_model.predict():
The following tutorials will provide you with step-by-step instructions on how to work with machine learning Python packages:
- What is a Keras model
- How to install Keras and TensorFlow
- What is Scikit-learn in Python
- How to install Scikit-learn
- How to make predictions with Scikit-Learn
- How to classify data in Python
- How to display a plot in Python
- How to build a Numpy array
- How to turn a Numpy array into a list
- How to label data for machine learning in Python
- How to run linear regressions in Python Scikit-Learn
- How to classify data in Python using Scikit-Learn
Get a version of Python, pre-compiled with Keras and other popular ML Packages
ActiveState Python is the trusted Python distribution for Windows, Linux and Mac, pre-bundled with top Python packages for machine learning – free for development use.
Some Popular ML Packages You Get Pre-compiled – With ActiveState Python
Machine Learning:
- TensorFlow (deep learning with neural networks)*
- scikit-learn (machine learning algorithms)
- keras (high-level neural networks API)
Data Science:
- pandas (data analysis)
- NumPy (multidimensional arrays)
- SciPy (algorithms to use with numpy)
- HDF5 (store & manipulate data)
- matplotlib (data visualization)
Get ActiveState Python for Machine Learning for Windows, macOS or Linux here.
Why use ActiveState Python instead of open source Python?
While the open source distribution of Python may be satisfactory for an individual, it doesn’t always meet the support, security, or platform requirements of large organizations.
This is why organizations choose ActiveState Python for their data science, big data processing and statistical analysis needs.
Pre-bundled with the most important packages Data Scientists need, ActiveState Python is pre-compiled so you and your team don’t have to waste time configuring the open source distribution. You can focus on what’s important–spending more time building algorithms and predictive models against your big data sources, and less time on system configuration.
ActiveState Python is 100% compatible with the open source Python distribution and provides the security and commercial support that your organization requires.
With ActiveState Python you can explore and manipulate data, run statistical analysis, and deliver visualizations to share insights with your business users and executives sooner–no matter where your data lives.
Download ActiveState Python to get started or contact us to learn more about using ActiveState Python in your organization.


