In my last CI/CD blog (How to Build a CI/CD Pipeline for Python), I explained how standardized tooling from ActiveState can simplify the setup of build environments by making the runtime environment perfectly reproducible not only on individual developer machines, but on CI/CD and production machines as well, with a single automatable command.
In summary:
- Problem – runtime environments vary across developer environments, resulting in “works on my machine” issues, and (ultimately) inconsistent Dev, Test & Production environments
- Standard Solutions – virtual environments, Docker containers, VMs, etc all of which can deliver consistent environments across Dev, Test & Production, but only at the expense of added complexity.
- A Better Idea – The ActiveState Platform, in conjunction with our CLI, the State Tool:
- Provides consistent reproducibility, eliminating “works on my machine” issues
- Ensures all dependencies are accounted for
- Does it all without introducing a new artifact to manage
Getting Started
This time around, I’ll discuss how the ActiveState solution can be applied to simplifying the setup of a CI/CD system for Windows builds using another popular CI/CD tool, AppVeyor as an example. Once again, I’ll be using a sample application written in Python and hosted on GitHub. AppVeyor will grab the source code from GitHub and the language runtime environment from the ActiveState Platform, and then build and run its tests for a successful round of development iteration. Not that while I’m using a Python project for this example, the methodology works just as well for Perl projects.
- The project’s code base is hosted on Github.
- The runtime environment for this project is located on the ActiveState Platform
We’ll use the standard git client to sync the code from GitHub, and the State Tool to sync the Python runtime environment from the ActiveState Platform. So before we can get started, you’ll need to:
- Sign up for a free ActiveState Platform account
- Install the State tool by issuing the following command in powershell (you will need this step as State Tool is not yet included by default in AppVeyor images):
IEX(New-Object Net.WebClient).downloadString('https://platform.www.activestate.com/dl/cli/install.ps1')
All set? Let’s dive into the details.
AppVeyor for Windows Builds
AppVeyor is a leading CI/CD service for Windows, which also supports Linux and macOS. In this case, I’ll be using it as a build example for Windows environments. The setup is not much different than the steps I went through when setting up Travis CI for Linux builds, namely:
1. Create an AppVeyor account and sign in.
2. Create a New Project:

3. Link your GitHub account to bring in your forked project:
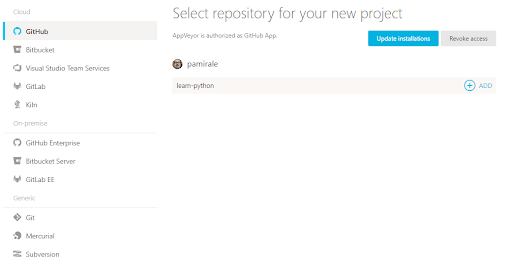
Bringing in your own projects via other supported source control systems is not difficult, and as long as you have the right .yml files with correct settings in your project, AppVeyor should be able to pick them up.
Once you’ve imported your project, there are a number of setup steps you’ll need to take:
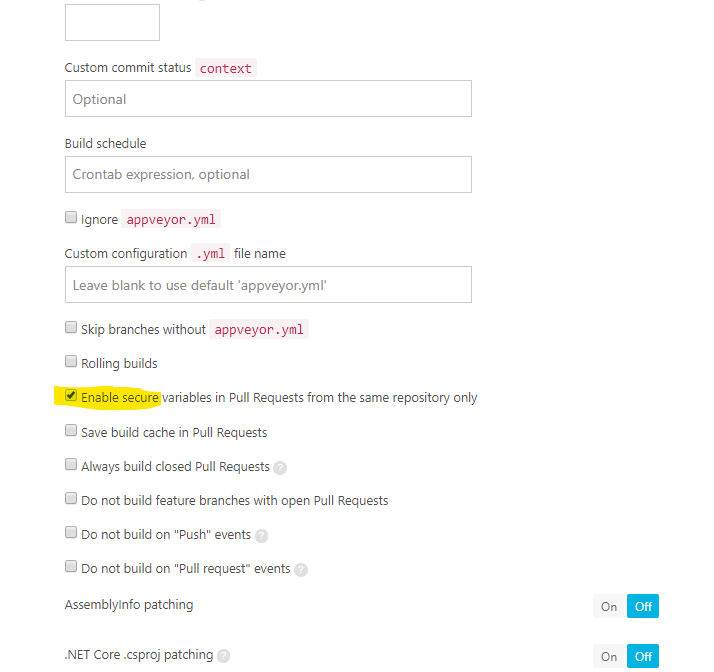
- Under Project Settings->General, you’ll need to scroll down and select the “Enable secure variables in Pull Requests from the same repository only” setting.
2. Create an environment variable, and enter your ActiveState API key under the Environment tab:
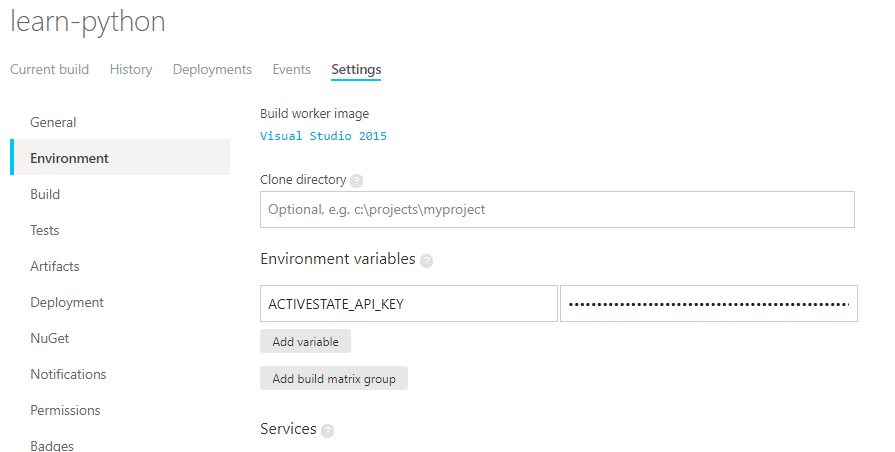
To get the API Key, first use the State Tool in powershell to authenticate:
state auth --username <yourname> --password <yourpassword>
And then run the following command:
curl -X POST "https://platform.www.activestate.com/api/v1/apikeys" -H "accept: application/json" -H "Content-Type: application/json" -H "Authorization: Bearer `state export jwt`" -d "{ \"name\": \"APIKeyForCI\"}"
The JSON response contains your API key in the “token” field (not “tokenID”). Copy this value (don’t forget to exclude the quotation marks around the text) into the ActiveState API Key Environment Variable you created in AppVeyor and you’re good to go.
1. Click the “Save” button at the bottom of the settings pages
2. Click the Current Build tab
3. Click the New Build button to start your build on AppVeyor.
The CI will pull it’s setting from appveyor.yml:
version: 1.0.{build}
image: Visual Studio 2019
init:
- ps: ''
install:
- ps: >-
    (New-Object Net.WebClient).DownloadFile('https://platform.www.activestate.com/dl/cli/install.ps1', 'install.ps1')
    Invoke-Expression "install.ps1 -n"
build_script:
- cmd: state --version
test_script:
- cmd: >-
    state run lints
    state run tests
The YAML file is pretty barebones:
- The build image is Visual Studio 2019 (VS), but technically there’s nothing for VS to build – it’s just the base image.
- The install section just installs the State Tool
- The state –version command basically just confirms the state tool is installed correctly
- The script section features linting and testing scripts, which are executed by the State Tool
Note that the linting and testing scripts are the same as those used for the Linux build on Travis CI, since the State Tool’s scripting capabilities are cross-platform. In fact, the only difference between an AppVeyor configuration for Windows and a Travis configuration for Linux is that the State Tool installation script is now executed by powershell in Windows.
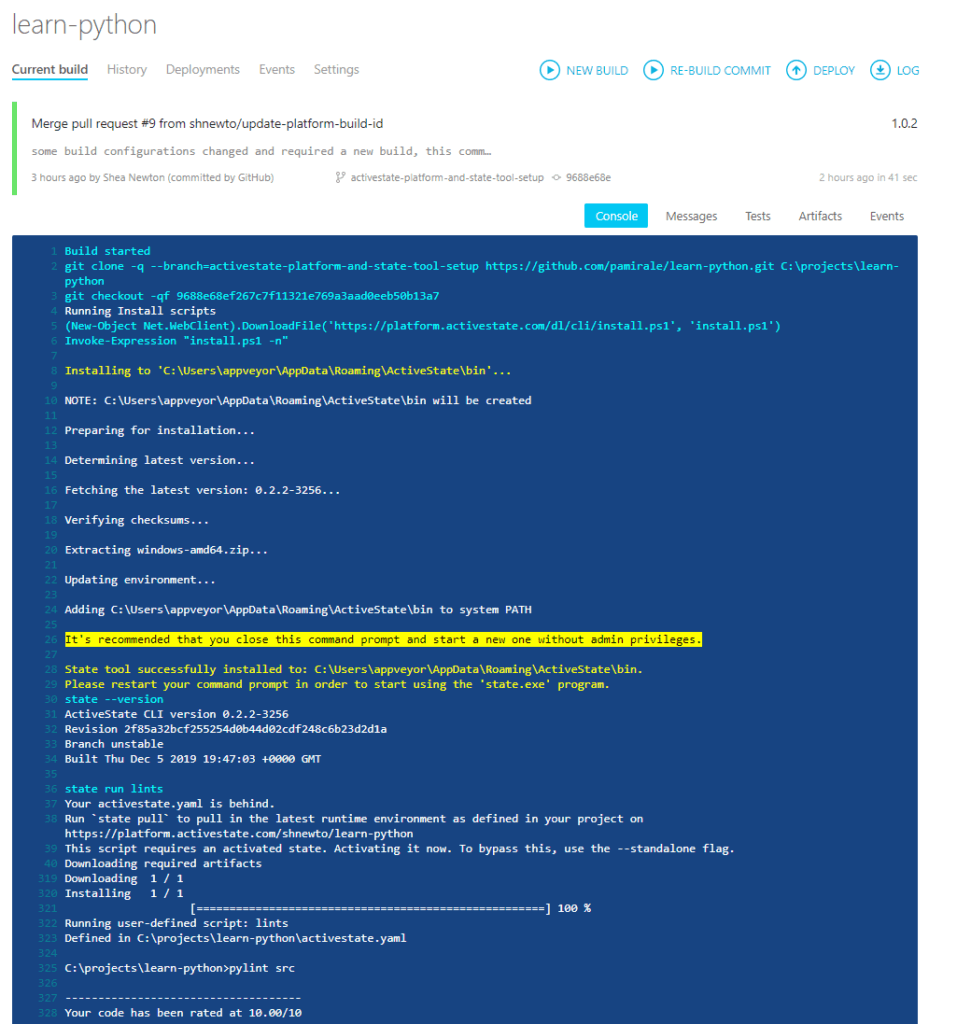
If everything went well, you should see a successful build from AppVeyor at this point:
Simplifying CI/CD Pipelines: Conclusion
The setup of CI/CD environments are more difficult than they need to be. A lot of the difficulty lies in trying to triangulate a CI/CD environment that can not only merge multiple different development environments but also output a production-ready solution. Put simply: organizations cannot trace a production workload back to its original packages and commits.
The ActiveState Platform, in conjunction with the State Tool, simplifies CI/CD setup by providing a consistent, reproducible environment deployable with a single command to developer desktops, test instances and production systems. Additionally, since the ActiveState Platform builds all runtime packages and dependencies from vetted source code, binary artifacts can be traced back to their original source, helping to resolve the build provenance issue.
In these ways, the ActiveState Platform effectively eliminates the “works on my machine” problem, and simplifies the setup of a more secure, consistent, up-to-date CI/CD pipeline.
- If you’d like to try it out, sign up for a free ActiveState Platform account where you can create your own runtime environment and download the State Tool.
- How does your enterprise’s practice of CI/CD compare to other enterprise’s CI/CD practice? Our State of Enterprise CI/CD 2020 survey has concluded and the results are here. In the meantime find our CI/CD resources here.
Related Blogs:


